Birthday Cake Pops
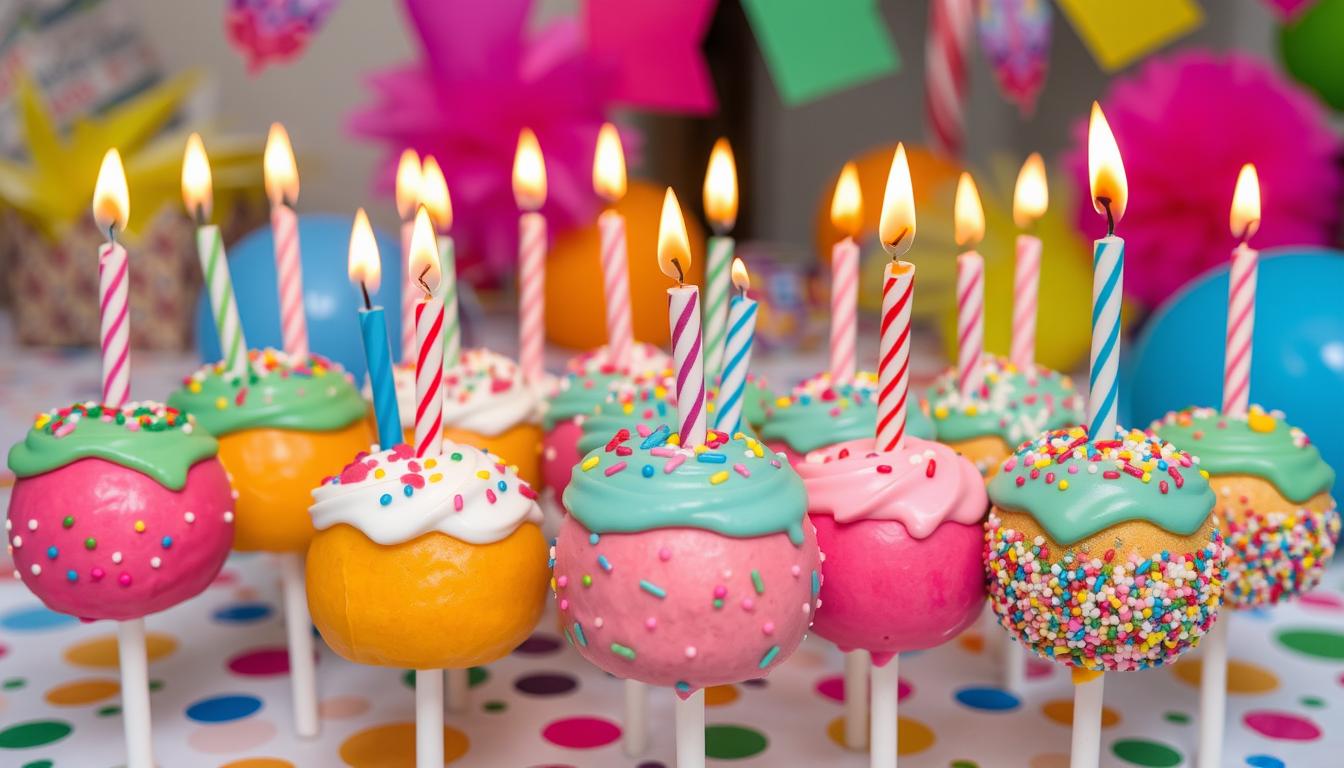
Birthdays are moments of pure joy. What better way to celebrate than with delightful birthday cake pops with candles? These treats turn ordinary desserts into magical memories that spark smiles and create lasting impressions.
Making the perfect birthday cake pop is an art. It combines creativity, skill, and a dash of love. Whether you’re a beginner baker or a seasoned pro, these decorating ideas will help you create stunning desserts that impress guests of all ages.
In this guide, we’ll show you five easy birthday cake pop recipes. They’re not just delicious but also incredibly fun to make. From classic designs to whimsical creations, these recipes will elevate your celebration game.
Table of Contents
Essential Ingredients and Tools for Perfect Cake Pops
Making unique cake pops starts with the right ingredients and tools. Whether for a birthday or just for fun, getting ready is crucial.
To make tasty cake pops, you need the right ingredients and tools. Let’s look at what you need to make amazing treats.
Basic Cake Pop Components
Your cake pop adventure starts with basic ingredients:
- 1 boxed cake mix (yields approximately 28 cake pops)
- 2 tablespoons vanilla frosting
- 1 lb white almond bark for coating
- Lollipop sticks (28 total)
Required Decorating Tools
To make your cake pops stand out, you’ll need these tools:
- Mixing bowls
- Electric mixer
- Baking sheet
- Parchment paper
- Dipping tools
Types of Candy Melts and Coatings
Choosing the right coating makes your cake pops special. Here’s a look at popular options:
| Coating Type | Flavor | Color Options | Difficulty Level |
|---|---|---|---|
| White Almond Bark | Neutral | Can be tinted | Easy |
| Colored Candy Melts | Sweet | Multiple colors | Moderate |
| Chocolate | Rich | Dark/Milk/White | Advanced |
Pro tip: Add a bit of vegetable oil to candy melts for the best dipping.
Step-by-Step Guide to Baking the Base Cake
Creating the perfect base for your birthday cake pop recipes starts with a delicious homemade cake. Preparing the right foundation is crucial for cake pop decorating ideas that will impress your guests.
- Preheat your oven to 350°F (175°C)
- Gather all ingredients for your cake base
- Prepare your baking pan with butter and flour
For your birthday cake pop base, you’ll need these key ingredients:
- 1 ¾ cups (250g) all-purpose flour
- 1 ¼ teaspoon baking powder
- ¼ teaspoon baking soda
- ½ teaspoon salt
- 6 tablespoons (84g) unsalted butter
- 1 ⅓ cups (265g) granulated sugar
Mixing the batter requires precision. Cream the butter and sugar until light and fluffy. Add eggs one at a time, mixing thoroughly. Slowly incorporate dry ingredients to prevent overmixing.
Baking time is critical for your cake pop base. Bake for 25-28 minutes, or until a toothpick comes out clean. Allow the cake to cool completely before crumbling – this is essential for perfect cake pop decorating ideas.
Pro tip for birthday cake pop recipes: Add ½ cup of rainbow jimmies and confetti sprinkles to your batter for extra festive flair!
Creating the Perfect Cake Pop Mixture
Making delicious birthday cake pops needs skill and precision. The secret to amazing kids birthday cake pops is mastering the mixture. Your journey begins with finding the right balance between cake and frosting.
Proper Crumbling Techniques
Crumbling your cake is an art that affects your cake pops’ texture. Here’s how to get it right:
- Allow cake to cool completely
- Break cake into small, uniform pieces
- Use your hands or a fork for consistent crumbling
- Aim for fine, sandy-like texture
Frosting to Cake Ratio Tips
Finding the right frosting balance is key for moist cake pops. Here’s a guide to get it just right:
| Cake Amount | Frosting Quantity | Texture Result |
|---|---|---|
| 1 cup crumbled cake | 2-3 tablespoons frosting | Perfect moldable consistency |
| 2 cups crumbled cake | 4-5 tablespoons frosting | Slightly firmer mixture |
Pro tip for kids birthday cake pops: Start with less frosting and add more until it holds a ball shape. The ideal mix is moist but not soggy.
Remember, temperature matters. Work in a cool place and chill your mix if it gets too soft. Your patience will pay off with perfect cake pops that everyone will adore!
Shaping and Forming Your Cake Pops
Making cake pops is an art that needs both skill and creativity. Your diy cake pop toppers will start with mastering the basic shaping techniques. These techniques make these treats irresistible.
Start by getting a clean workspace ready with chilled cake mixture. The secret to perfect festive cake pop ideas is consistent size and smooth shapes. Use these professional techniques to make your cake pops look professional:
- Use a small cookie scoop for uniform portioning
- Roll mixture between palms to create smooth spheres
- Aim for golf ball-sized cake balls
- Chill shaped balls for 30 minutes before dipping
Professional bakers say working with small batches keeps the texture right. Chilling helps cake pops keep their shape when you coat them.
For unique festive cake pop ideas, try different shapes. Hearts for Valentine’s Day or stars for birthdays are great.
| Shape | Ideal Occasion | Difficulty Level |
|---|---|---|
| Sphere | Classic Birthday | Easy |
| Heart | Valentine’s Day | Medium |
| Star | Graduation | Advanced |
Your diy cake pop toppers will get better with practice. Remember, it’s more about being consistent than perfect when shaping your treats.
Birthday Cake Pops Fun with Candles
Adding candles to birthday cake pops makes them festive treats. They become the highlight of any party. Creative candle techniques add magic to your fun cake pop experience.
Candle Placement Techniques
There are many ways to decorate birthday cake pops with candles:
- Direct insertion of mini candles into cake pop centers
- Using special candle holders for stable placement
- Creating number-shaped cake pops with corresponding age candles
Safety Considerations for Candles
It’s important to keep birthday cake pops with candles safe. Always watch children when lighting candles. Here are some safety tips:
- Use short, thin candles for better balance
- Place candles gently to prevent cake pop cracking
- Keep candle flames away from decorative elements
| Candle Type | Best For | Difficulty Level |
|---|---|---|
| Mini Stick Candles | Standard Cake Pops | Easy |
| Number Candles | Age-Specific Celebrations | Medium |
| Sparkler Candles | Dramatic Effect | Advanced |
Follow these tips to make your birthday cake pops a hit. They’ll taste great and be a memorable part of any celebration!
Professional Dipping and Coating Methods
Mastering cake pop decorating is all about precision and practice. Your coating technique can turn simple cake pops into stunning desserts. These will surely impress anyone.
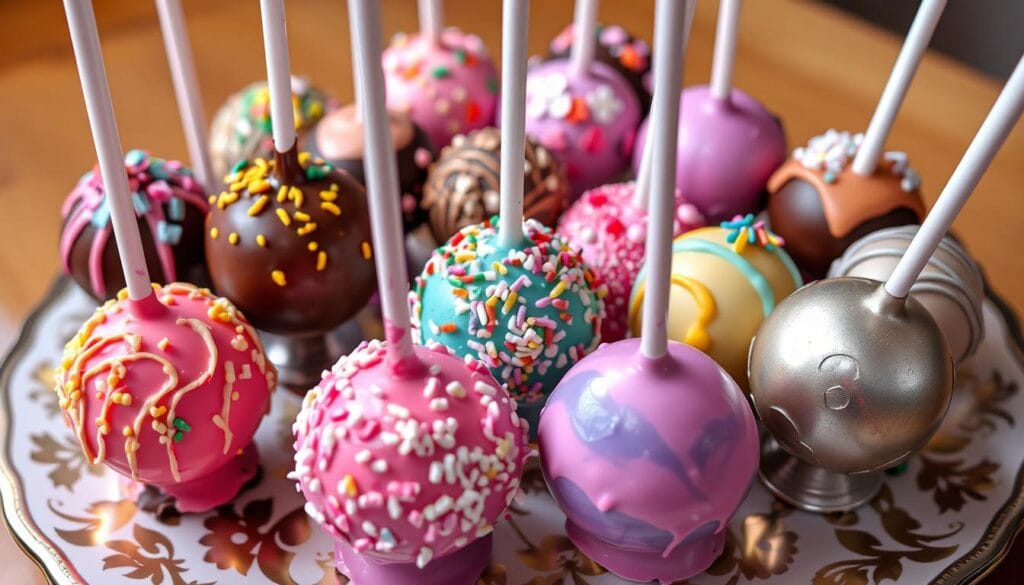
To make colorful cake pops, you need to follow specific dipping methods. This ensures a smooth and even finish. Start by picking high-quality candy melts in various colors. This will make your cake pops look amazing.
Essential Coating Techniques
- Melt candy melts at precisely 100-110°F
- Use a deep, narrow container for easy dipping
- Tap off excess coating gently
- Allow cake pops to set at room temperature
When working with candy melts, temperature control is key. Too hot, and your coating will be thin; too cool, and it will be lumpy. You want a smooth, fluid consistency. This will make your cake pop look perfect.
“The secret to perfect cake pops is patience and technique” – Professional Baker
| Coating Type | Difficulty Level | Visual Appeal |
|---|---|---|
| Standard Candy Melt | Easy | Good |
| Marbled Effect | Medium | Excellent |
| Double-Dipped | Advanced | Outstanding |
For amazing cake pop decorating ideas, try different techniques. Drizzle contrasting colors or create marbled effects. Your creativity will make each cake pop unique and special.
Creative Display Ideas for Birthday Celebrations
Make your birthday party unforgettable with amazing cake pop displays. These displays can turn a simple dessert table into a stunning centerpiece. Your cake pop display is not just for serving. It’s a way to show off the celebration’s spirit through art.
Choosing the right display can really make your cake pops stand out. Here are some cool ways to show off your treats:
- Acrylic risers for modern, sleek presentations
- Repurposed cupcake stands to maximize space
- DIY cake pop trees for interactive displays
- Mirrors to add elegance and visual depth
- Mini flower pots for a whimsical touch
Theme-Driven Cake Pop Arrangements
Your cake pop stand can match the party’s theme. For kids’ parties, use bright stands. For adult parties, go for sleek metallic or glass displays.
Pro tip: Mix the heights of your stands for interest. Use pedestals, tiered trays, and different sizes to make your table pop.
Personalization Strategies
Add personal touches to make your display unique. Use custom tags, themed decorations, and colors that match the birthday person. This way, your stand becomes a special piece that shows off the birthday person’s style.
Storage and Preservation Guidelines
Keeping your birthday cake pop recipes fresh is key. Cake pops are delicate and need careful handling. This helps keep their taste and look great.
Proper storage is crucial for cake pops. Here are some tips to keep them fresh:
- Room temperature storage: 2-3 days maximum
- Refrigerator storage: Up to 7 days
- Freezer storage: Up to 3 months
Here are some important storage tips:
- Always use airtight containers
- Place wax paper between layers to prevent sticking
- Keep away from direct sunlight and heat sources
Freezing cake pops needs extra care. Wrap each pop in plastic wrap, then in a freezer-safe container. Pro tip: Thaw frozen cake pops in the refrigerator for best results, allowing 8-12 hours for gradual defrosting.
| Storage Method | Duration | Quality Retention |
|---|---|---|
| Room Temperature | 2-3 days | Good |
| Refrigerator | Up to 7 days | Excellent |
| Freezer | Up to 3 months | Very Good |
Watch for signs of spoilage like texture changes, odd smells, or mold. The shelf life of cake pops varies. It depends on the ingredients, coating, and storage.
Troubleshooting Common Cake Pop Issues
Making perfect cake pops takes skill and practice. Even experienced bakers face challenges. Knowing common problems helps you improve your cake pop designs.
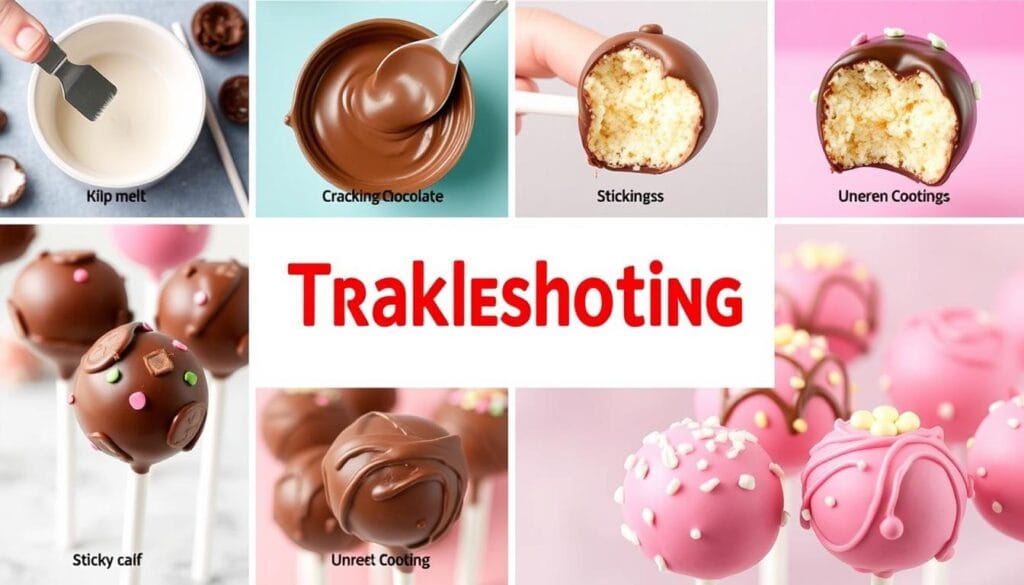
Several issues can happen when making cake pops. Temperature and mixture consistency are key for great results.
Preventing Cracking and Falling
To stop cake pops from falling, follow these tips:
- Make sure cake balls are 1 inch in diameter to avoid weakness
- Chill cake balls for 20 minutes before adding sticks
- Dip the stick tip in melted candy before adding to cake ball
- Keep the dipping temperature between 90-100°F
Fixing Coating Problems
Smooth coating is essential for professional cake pops. Here are fixes for common coating issues:
| Issue | Solution |
|---|---|
| Thick Coating | Add 1 tablespoon of shortening to thin candy melts |
| Bubbles | Tap stick gently to remove air bubbles |
| Uneven Coverage | Use slow, consistent dipping motion |
Mastering these techniques will make your cake pops stunning. Remember, every imperfect cake pop is a chance to improve your skills.
Tips for Transporting Cake Pops
When moving birthday cake pops, it’s important to plan carefully. You want them to arrive looking great and tasting amazing. Whether you’re off to a party or bringing a sweet treat, keeping them safe is key.
- Use a dedicated cake pop stand for secure transportation
- Choose sturdy, breathable packaging options
- Control temperature during transit
- Protect individual cake pops from damage
For your cake pop stand inspiration, think about simple DIY ideas or professional cases. Here are some practical ways to transport them:
- Foam Block Method: Make holes in a foam block to hold cake pop sticks
- Cardboard Box Hack: Line a box with parchment paper and make holes
- Professional Carrier: Get a special cake pop transport container
Keeping the temperature right is crucial for birthday cake pops. They should be cool, not frozen, while in transit. Wrap each pop in cellophane to stop them from sticking and to keep their coating safe. If it’s hot outside, use a cooler with ice packs to keep them at the right temperature.
A cake pop stand is a great tool for moving these treats. Look for stands that can adjust height and have a firm grip. This helps prevent them from sliding or falling.
Time-Saving Preparation Strategies
Making delightful diy cake pop toppers doesn’t have to take a lot of time. With smart planning, you can make the process fun and quick for both parents and kids.
- Advance Cake Base Preparation
- Bake cake bases up to 3 days before the event
- Store unfrosted cakes in the refrigerator
- Partially freeze cakes for easier handling
- Ingredient and Equipment Prep
- Measure ingredients in advance
- Set up a dedicated workspace
- Clean tools and surfaces beforehand
- Decoration Efficiency
- Prepare diy cake pop toppers in batches
- Use simple decorating techniques like sprinkles
- Involve children in decorating for faster completion
Here are some tips to manage your time well and enjoy making cake pops:
| Strategy | Time Saved | Difficulty Level |
|---|---|---|
| Advance Cake Baking | 2-3 hours | Easy |
| Bulk Decoration | 1-2 hours | Medium |
| Freezing Cake Bases | 45-60 minutes | Easy |
Pro tip: Break down the cake pop making process into manageable steps spread across multiple days to reduce stress and make the experience more enjoyable for everyone involved.
Conclusion
Creating birthday cake pops with candles turns simple desserts into special celebrations. Your journey in making these treats is more than baking. It’s about creating memories filled with joy and creativity.
The art of making festive cake pop ideas brings people together. It turns simple ingredients into beautiful treats. This makes every moment special.
As you’ve learned, making birthday cake pops with candles takes practice and patience. Each pop is a chance to show off your creativity. You can try new decorating styles and designs.
These treats are perfect for any celebration, big or small. They add a delicious touch to any special moment.
We encourage you to be creative and try new things. Don’t worry about making mistakes. The joy of making these treats is what matters most.
Share your creations and enjoy the smiles they bring. Keep improving your skills. Your birthday cake pops will become cherished memories.
Start baking, get creative, and have fun with your festive cake pop ideas. Your culinary adventure is just beginning!
FAQ
How difficult are birthday cake pops to make?
What basic ingredients do I need to make cake pops?
How far in advance can I make birthday cake pops?
Can I make cake pops without a special cake pop maker?
How do I prevent cake pops from falling off the stick?
Are cake pops suitable for children’s birthday parties?
How can I make my cake pops look more professional?
What are some creative ways to display cake pops?
Can I make cake pops with dietary restrictions?
How do I safely add candles to cake pops?
Did You Try Our Recipe? Share Your Thoughts!
There are no reviews yet. Be the first one to write one.

