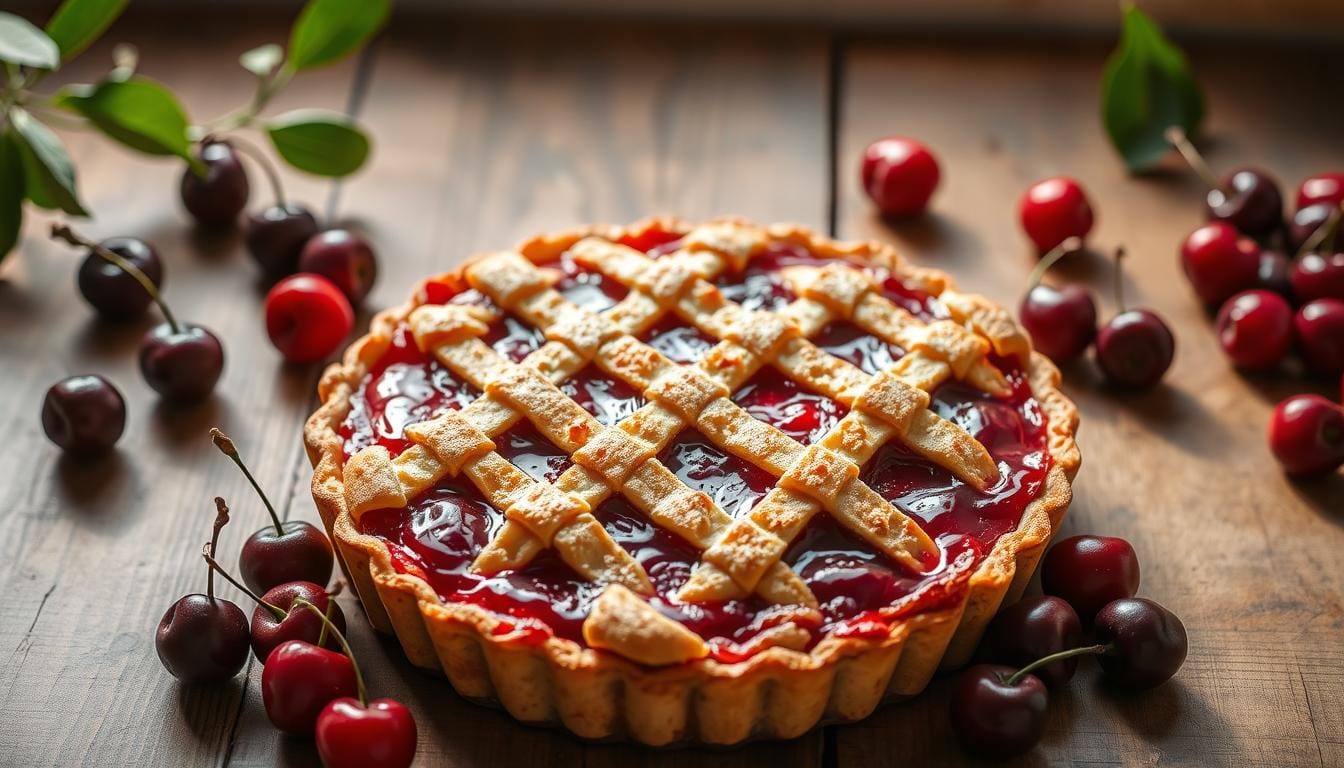
Cherry Tart Recipe
Summer memories often taste sweet, and nothing captures that essence quite like a homemade cherry tart. Every bite takes you to sun-drenched orchards. There, ripe cherries hang heavy on branches, waiting to become a delicious cherry dessert.
Making the perfect cherry tart recipe is more than just following instructions. It’s about creating an experience. Whether you’re new to baking or have years of experience, this recipe offers a sophisticated dessert. It looks impressive but is surprisingly easy to make.
Imagine serving a stunning cherry tart that needs only 20 minutes of prep and 45 minutes of baking. The result? A dessert for 8 that looks like it came from a professional bakery.
Table of Contents
Understanding Cherry Varieties for Perfect Tart Making
Making the perfect cherry tart begins with picking the right cherries. With over 1,000 types to choose from, it can be hard to decide. Let’s dive into the world of cherries and find the best ones for your tart.
Sweet vs. Sour Cherries: A Flavor Journey
Cherries fall into two main groups that affect your tart:
- Sweet Cherries: Darker and easier to find in stores
- Bing cherries: Glossy and sweet with balanced flavor
- Rainier cherries: Yellow-blushed with high sugar content
- Sour Cherries: More complex flavor
- Montmorency cherries: Extremely tart, perfect for baking
- Morello cherries: Balanced sweet-sour characteristics
Selecting and Storing Fresh Cherries
When picking cherries for your tart, look for these traits:
| Cherry Type | Best Use | Storage Tips |
|---|---|---|
| Bing Cherries | Fresh eating, dessert garnish | Refrigerate, unwashed, up to 5 days |
| Montmorency | Baking, pies, tarts | Freeze for extended use |
| Rainier | Salads, light desserts | Keep cool, consume within 2-3 days |
Frozen and Canned Alternatives
Can’t find fresh cherries? No worries! Frozen and canned cherries are great substitutes. Drain canned cherries well and dry them to avoid extra moisture in your tart.
“The secret to a perfect cherry tart is understanding your fruit’s unique characteristics.” – Pastry Chef Elena Rodriguez
Pro tip: Try different cherry types to find your favorite flavor. Each variety adds a special touch to your baking journey!
Essential Ingredients and Equipment Overview
Making the perfect sweet cherry pie or fruit tart needs the right ingredients and tools. Knowing the best tools and ingredients will make your baking better.
Crucial Ingredients
- Butter: 230 grams of unsalted butter (120g for crust, 60g additional, 50g for topping)
- Whole wheat flour: 230 grams
- Granulated sugar: 50 grams
- Brown sugar: 2 tablespoons
- Fine sea salt: 1/2 teaspoon
- Corn starch: 35 grams (for thickening cherry filling)
Must-Have Equipment
- 9-10 inch tart pan with removable bottom
- Cherry pitter
- Fine mesh strainer
- Mixing bowls
- Measuring cups and spoons
Choosing cherries for your tart is key. Sweet cherries are always available, but sour cherries are seasonal. The right tools can make your baking better.
“Baking is love made edible” – Unknown
A tart pan with a removable bottom makes serving easy. A cherry pitter saves time and avoids mess. Good tools make baking fun and easy.
Mastering the No-Chill Butter Tart Crust
Creating the perfect cherry pastry crust can make your baking stand out. The no-chill butter tart crust is a game-changer. It saves time without losing flavor or texture.
Starting your cherry baking journey means learning about the no-chill crust. This method skips the long chill time. It lets you make a tasty tart shell fast and easy.
Traditional vs. Quick-Method Crust
Traditional pie crusts need a lot of chilling. But the no-chill method is different. Here’s a quick look at the difference:
- Traditional Method: Long preparation, multiple chilling steps
- No-Chill Method: Immediate mixing and baking
- Time Saved: Approximately 2-3 hours
Tips for Perfect Crust Texture
Getting the right texture for your cherry pastry crust is key. Here are some expert tips:
- Use room temperature butter for smoother mixing
- Mix ingredients thoroughly but avoid overworking the dough
- Roll out to precisely 1/8-inch thickness
Preventing Common Crust Problems
| Issue | Prevention Strategy |
|---|---|
| Shrinkage | Allow 1/2-inch border, avoid stretching dough |
| Tough Texture | Minimal handling, use cold ingredients |
| Uneven Baking | Maintain consistent 375°F temperature |
“The secret to perfect cherry baking is not just in the ingredients, but in the technique.” – Pastry Chef Emma Richardson
Mastering these techniques will make your cherry pastry crust amazing. Your tart will have a crisp, golden outside and a soft, flavorful inside. It’s a true celebration of baking.
The Ultimate Cherry Tart Recipe

Making the perfect cherry tart is all about precision and passion. This recipe will turn your kitchen into a sweet paradise. It promises a dessert that will wow everyone every time.
Ingredients Breakdown
Crust Ingredients
- 1¼ cups almond flour
- ¼ cup arrowroot
- 1 tablespoon maple syrup
- 2½ tablespoons palm shortening
- 2 teaspoons filtered water
Filling Ingredients
- ¼ cup palm shortening
- ¼ cup maple syrup
- 1 cup almond flour
- 1 large egg
- ¼ teaspoon almond extract
- 10 oz pitted cherries
Start by making a gluten-free crust that’s both tender and tasty. Mix the almond flour mixture and press it into your tart pan. This creates a delicate base for the filling.
“Baking is love made edible” – Unknown Pastry Chef
Baking Instructions
- Preheat oven to 350°F
- Blind bake crust for 10 minutes
- Prepare cherry filling
- Add filling to pre-baked crust
- Bake for additional 30 minutes
| Nutritional Value | Per Serving |
|---|---|
| Calories | 384 |
| Total Fat | 33g |
| Protein | 6g |
Pro tip: For the best cherry filling, use fresh or thawed cherries. This keeps the fruit’s color and texture while making a rich filling.
Your cherry tart is now ready to impress. It’s a dessert that combines rustic charm with sophisticated taste.
Creating the Perfect Cherry Filling
Making a great cherry tart starts with a perfect cherry filling. This filling is the dessert’s heart, shaping its taste and feel. Let’s explore how to make a cherry filling that will make your tart unforgettable.
Proper Cherry Preparation Techniques
Here’s how to prepare cherries for your tart:
- Choose fresh, ripe cherries with deep color and firm texture
- Wash cherries well before pitting
- Use a cherry pitter or a chopstick to remove pits
- Go for 6 cups (about 24 oz) of pitted cherries
Balancing Sweetness and Tartness
The secret to a great cherry filling is balanced flavors:
| Cherry Type | Sugar Recommendation | Flavor Profile |
|---|---|---|
| Sweet Cherries | 2/3 cup (130g) | Mild, less tart |
| Sour Cherries | 3/4 cup (150g) | Intense, tangy |
Thickening Methods for Ideal Consistency
To get the right cherry filling consistency, try these methods:
- Cornstarch method: Use 2 tablespoons (15g) cornstarch
- Cooking technique: Simmer cherries to release natural pectin
- Optional flavor enhancers:
- 1/2 teaspoon almond extract
- 1 tablespoon amaretto liqueur
“The key to an extraordinary cherry tart is in the details of your filling preparation.”
Pro tip: Let your cherry filling cool completely before assembling the tart. This avoids a soggy bottom and gives you clean, beautiful slices.
Professional Tips for Assembly and Presentation
Making a stunning cherry dessert is more than just a recipe. It’s about the art of presentation. Professional bakers know how to turn a simple tart into a culinary masterpiece.

When you put your cherry tart together, be precise. Here are some expert tips to make your dessert stand out:
- Distribute cherry filling evenly across the crust
- Use a smooth, consistent spreading technique
- Prevent excess moisture from saturating the base
Chilling is key to getting professional results. Chilling the tart for 30 minutes ensures neat slices. It helps set the filling and keeps the tart’s shape.
“A well-presented tart is a feast for both eyes and palate.” – Pastry Chef Insight
For a stunning finish, try these garnishing ideas:
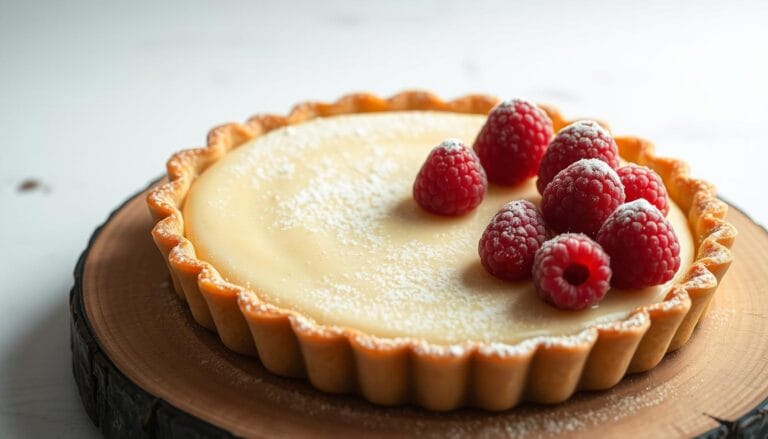
- Dust with powdered sugar for elegant presentation
- Arrange fresh cherries strategically around the edges
- Add a dollop of whipped cream or vanilla ice cream
| Presentation Technique | Impact |
|---|---|
| Powdered Sugar Dusting | Adds visual softness and sophistication |
| Fresh Cherry Garnish | Enhances color and signals freshness |
| Whipped Cream | Provides creamy contrast to tart cherries |
A perfectly made cherry tart should be eaten within 24 hours. This keeps the texture and flavor at their best. Your hard work will turn a simple tart into a feast for the eyes and taste buds.
Troubleshooting Common Cherry Tart Issues
Making the perfect cherry tart can be tough, but with the right steps, you can beat common problems. Cherry baking needs patience and skill to make a dessert that wows everyone.
Preventing Soggy Bottoms
A soggy crust can mess up your cherry tart. Here are some expert tips to avoid it:
- Pre-bake the crust for 10-12 minutes before adding filling
- Drain cherries thoroughly to reduce excess moisture
- Dust the bottom crust with breadcrumbs or ground almonds
- Use cornstarch to thicken cherry filling and prevent liquid seepage
Fixing Filling Problems
Get the perfect cherry filling with these tips:
- Cook cherries briefly to release excess water
- Balance sweetness with a touch of lemon juice
- Use clear gel or cornstarch for ideal consistency
Storage Solutions
Storing your tart right keeps it fresh and tasty:
| Storage Method | Duration | Recommended Condition |
|---|---|---|
| Refrigeration | Up to 5 days | Cover with loose plastic wrap |
| Room Temperature | 1-2 days | Keep in cool, dry place |
| Freezing | Up to 2 months | Wrap tightly in plastic and aluminum foil |
“Perfecting your cherry tart is an art of patience and practice.” – Professional Pastry Chef
Pro tip: Always let your tart cool completely before storing to prevent condensation and maintain crust crispness.
Seasonal Variations and Creative Twists
Make your sweet cherry pie a year-round treat by trying new seasonal twists. The classic cherry dessert is perfect for getting creative. You can use new ingredients and methods to make it your own.
When cherries are in season, use the freshest ones. But when they’re not, try these tasty alternatives:
- Substitute with seasonal stone fruits like apricots or peaches
- Experiment with mixed berry combinations
- Use frozen or preserved cherries for consistent flavor
Give your cherry dessert a unique twist with these ideas:
- Incorporate warm spices like cinnamon or cardamom
- Add citrus zest for brightness
- Blend in chocolate or nutty elements
“Creativity in baking is about transforming classic recipes into personal culinary expressions.” – Pastry Chef Insight
Here’s a guide for pairing flavors in your sweet cherry pie:
| Season | Recommended Twist | Flavor Profile |
|---|---|---|
| Spring | Lavender-infused cherries | Delicate, floral |
| Summer | Classic fresh cherry | Bright, pure |
| Autumn | Spiced cherry with pecans | Warm, rich |
| Winter | Chocolate-dipped cherry | Decadent, intense |
Use the art of culinary adaptation to make your cherry dessert a canvas for creativity and personal touch.
Serving Suggestions and Pairings
Your homemade cherry tart deserves the best presentation and sides. The right way to serve it can make it go from good to great.
Temperature is key when enjoying your tart. Serve it slightly warm or at room temperature. This lets the cherry filling stand out and keeps the crust delicate.
Complementary Pairings
- Vanilla Ice Cream: A classic that balances the tart’s richness
- Whipped Cream: Adds a light, creamy contrast to the fruit filling
- Vanilla Custard Sauce: Enhances the dessert’s sophistication
Beverage Recommendations
| Beverage Type | Recommended Pairing |
|---|---|
| Non-Alcoholic | Sparkling water with lime, Chamomile tea |
| Alcoholic | Moscato, Light dessert wine, Cherry-infused cocktail |
Think of the cherry tart as the star of your dessert table. It fits well with many themes, from casual to fancy.
“A perfect cherry tart is not just a dessert, it’s an experience waiting to be savored.”
Pro tip: Top with fresh cherries or a sprinkle of powdered sugar. It will make your tart look amazing and impress your guests.
Conclusion
Your journey to make the perfect cherry tart recipe has given you professional baking skills. You’ve learned how to pick the best cherries and make a flaky crust. Now, you can make an amazing cherry dessert that will wow everyone.
This cherry tart recipe is great for any event, from summer picnics to fancy dinner parties. You’ve learned how to choose cherries, prepare them, and bake them. This turns a simple dessert into a masterpiece that shows off your skills.
Don’t forget, practice is key. Every time you bake this tart, you’ll get better and enjoy the process more. Your homemade cherry dessert will delight everyone and create special memories at the dinner table.
We encourage you to share your cherry tart stories, ask questions, and try new things. Your baking journey is just starting, and there are so many delicious cherry desserts waiting for you to try.
FAQ
What type of cherries work best for this tart recipe?
Can I make the tart crust ahead of time?
How do I prevent a soggy bottom in my cherry tart?
How long will the cherry tart stay fresh?
Can I substitute fresh cherries with other fruits?
What equipment do I absolutely need to make this cherry tart?
How can I tell when the cherry tart is fully baked?
Can this cherry tart be frozen?
Did You Try Our Recipe? Share Your Thoughts!
There are no reviews yet. Be the first one to write one.