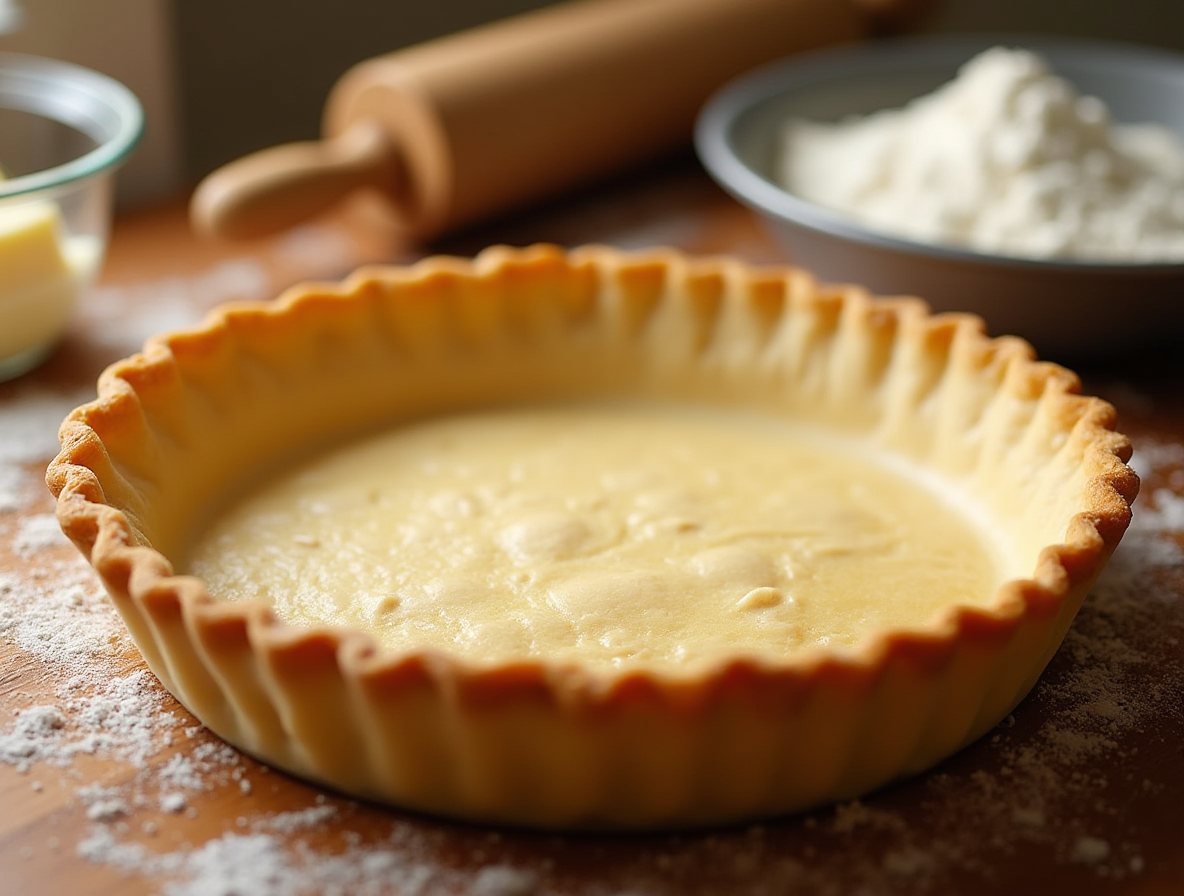
The Ultimate Crisco Pie Crust Recipe – Make It from Scratch!
Table of Contents
Making a flaky homemade pie crust can seem hard, but it’s easier than you think. With the right techniques and Crisco shortening, you can make a pastry that rivals the bakery. This guide will show you how to make a Crisco pie crust from scratch. Your pies will have a tender, buttery crust that will wow everyone.
Key Takeaways
- Understand the key ingredients and equipment needed for making the perfect Crisco pie crust
- Discover the importance of temperature control and proper mixing techniques for a flaky texture
- Learn how to roll out and handle the dough to prevent common issues like toughness or shrinkage
- Explore tips and tricks for a consistently delicious Crisco pie crust, from storage to decorative finishing touches
- Troubleshoot any problems that may arise during the crust-making process
Understanding the Basics of Perfect Pie Crusts
Making a delicious Crisco pie crust begins with knowing the basics. It’s about getting the flaky texture and rich taste right. You need the right tools, ingredients, and to know about temperature. Mastering these basics is key to baking top-notch pies every time.
Essential Equipment for Pie Making
The right tools are crucial for pie-making. Get a strong pastry blender, a rolling pin, and measuring cups and spoons. These pie-making tools make handling the dough easy and ensure a crust that’s perfectly even.
Key Ingredients Overview
- All-purpose flour: It’s the base of a Crisco pie crust, giving it structure and texture.
- Crisco shortening: This fat makes the crust flaky and tender.
- Salt: It boosts the flavor of the crust.
- Ice water: It holds the ingredients together, making the dough cohesive and pliable.
Temperature Considerations
Temperature is key for a successful Crisco pie crust. Keep all cold ingredients cold until you’re ready to use them. Work in a cool place to stop the fat from melting too soon. This keeps the crust flaky and tender.
| Ingredient | Ideal Temperature |
| Flour | Room temperature |
| Crisco shortening | Chilled |
| Ice water | Very cold |
Why Choose Crisco for Your Pie Crust
Choosing the right shortening is key to a perfect pie crust. Crisco, a well-known vegetable shortening, stands out. It gives a flakier texture and a tender crumb, loved by many bakers.
Crisco’s special molecular structure helps mix in air pockets. This makes the crust light and delicate. Other fats might make the crust dense or tough.
Using Crisco also means a golden-brown crust that looks great. Its high smoke point and stable nature prevent burning or discoloration. This is great for beginners learning to make pies.
| Shortening Type | Flaky Texture | Smoke Point | Consistency |
| Crisco | Excellent | High | Stable |
| Butter | Good | Moderate | Prone to Burning |
| Lard | Fair | High | Inconsistent |
In summary, the right vegetable shortening is essential for a great pie crust. Crisco’s unique qualities, like its flakier texture and benefits, make it a top choice for bakers.
Essential Ingredients for a Crisco Pie Crust
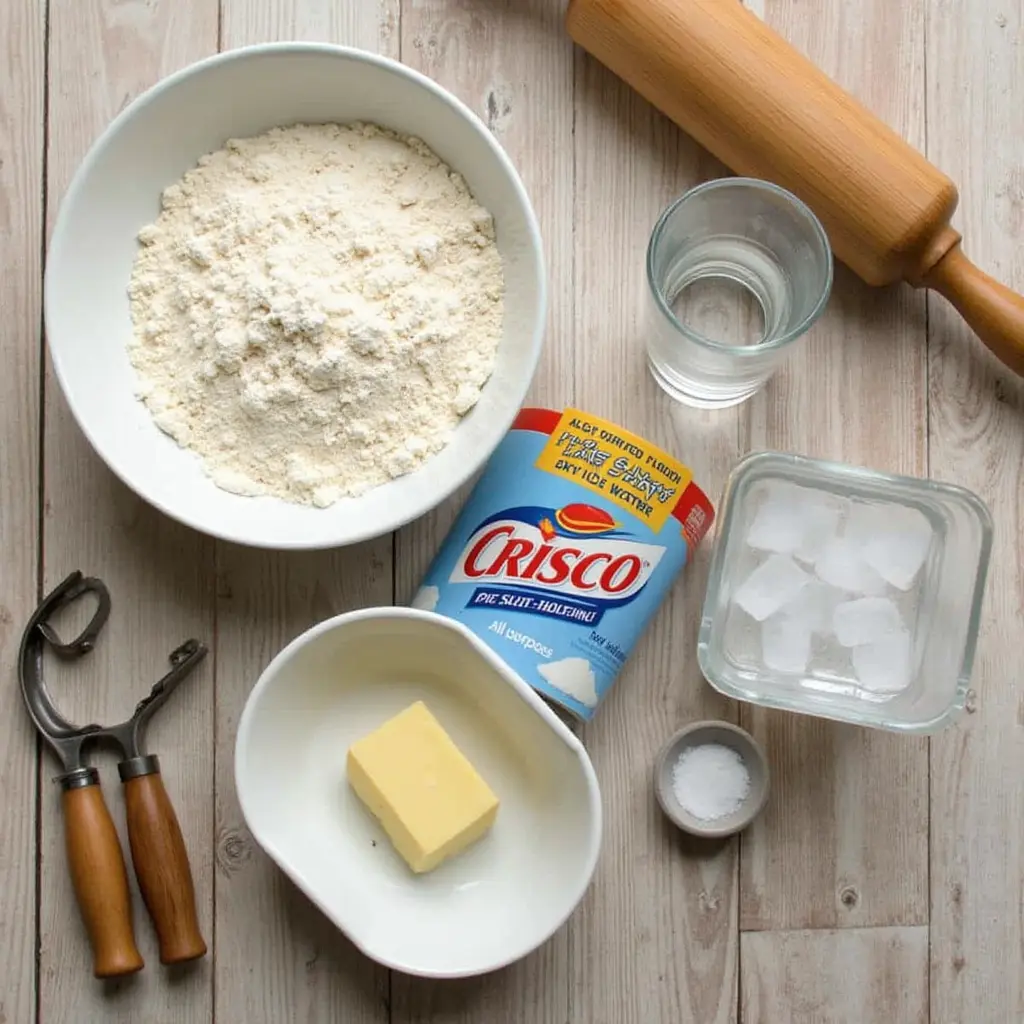
Making a delicious Crisco pie crust starts with the right ingredients. You need the best all-purpose flour, the right amount of salt, and ice water. Each part is important for a flaky and tender crust. Let’s look at what makes a Crisco pie crust special.
All-Purpose Flour Selection
The base of a Crisco pie crust is all-purpose flour. Choose a high-quality, unbleached flour without additives. This flour gives your crust the structure it needs to stay in shape while baking.
Salt and Water Measurements
Seasoning is key for a tasty Crisco pie crust. The right salt amount and ice water help bind the dough. This prevents it from becoming dry or tough. Make sure to follow the recommended amounts for the best results.
Crisco Type and Temperature
Crisco shortening is crucial for a classic pie crust. Use chilled Crisco for the best results. This keeps the shortening solid and flaky, making your crust tender.
| Ingredient | Amount |
| All-Purpose Flour | 2 1/4 cups |
| Salt | 1 teaspoon |
| Chilled Crisco Shortening | 3/4 cup |
| Ice Water | 6-8 tablespoons |
By choosing and measuring these ingredients carefully, you’ll make a Crisco pie crust that tastes great and looks good too.
Step-by-Step Crisco Pie Crust Preparation
Making the perfect pie dough is an art. With Crisco, it becomes a fun mix of precision and skill. Let’s explore how to make a Crisco pie crust that will wow your guests and satisfy your taste buds.
Measuring Ingredients Accurately
Start by measuring your flour and Crisco shortening accurately. The right pie dough recipe ratio is key for the perfect dough consistency. Spoon the flour carefully into your measuring cup to avoid packing it down.
Cutting in the Crisco
Use a pastry cutter or two forks to cut in the Crisco into the flour.Continue mixing until the mixture resembles coarse crumbs. This step is vital for the flaky texture of Crisco pie crusts.
Incorporating Water Gradually
Add ice-cold water slowly, one tablespoon at a time. Mix gently until the dough starts to come together. Remember, don’t overmix to avoid a tough crust.
Shaping the Dough
When the dough is just right, shape it into a ball and split it in half. Make each half into a disk, then wrap them in plastic. Refrigerate for at least 30 minutes before rolling out.
By following these steps, you’ll create a Crisco pie crust that’s not only stunning but also flaky, tender, and full of flavor.
Mixing Techniques for the Perfect Texture
To get the perfect texture for your Crisco pie crust, you need to master the mixing techniques. It’s all about cutting in the shortening right and adding water slowly. Each step is crucial for a flaky, tender crust.
Cutting in the Shortening
When cutting in the Crisco shortening, use a pastry blender or your fingers. Work the fat into the flour until it looks like coarse pea-sized crumbs. This step is key to creating flaky layers in your pie crust.
Adding Water Properly
- Start by adding a little bit of ice water, like a tablespoon or two.
- Use a fork or your hands to mix in the water gently. Be careful not to overmix.
- Keep adding water a little at a time until the dough starts to come together but is still a bit crumbly.
Achieving the Right Consistency
Pie dough should be pliable but firm. When you pinch a small amount of dough, it should hold its shape without being sticky or wet. This is the right dough texture for rolling and shaping your Crisco pie crust.
| Technique | Description | Result |
| Cutting in Shortening | Cut the Crisco into the flour until it resembles pea-sized crumbs. | Flaky layers in the crust |
| Adding Water | Gradually add ice water, 1-2 tablespoons at a time, until the dough forms | Proper dough texture for rolling and shaping |
Rolling Out Your Pie Dough
Getting the perfect pie crust starts with rolling out your Crisco pie dough right. This step is key for a flaky, tender crust. It will make your baked goods even better.
Begin by lightly dusting your work surface and rolling pin with flour.. This stops the dough from sticking. Start rolling the dough from the middle and work your way out, keeping it round. Rotate it often to keep the thickness even.
Watch the dough’s thickness as you roll. Aim for 1/8-inch for a perfect crust. Don’t roll too much, or your crust will be tough and dry.
When the dough is the right thickness, fold it in half twice. This makes it easier to handle. Place it in your pie plate, unfolding it to fit. Press it into the corners and sides gently, without stretching or tearing.
Mastering how to roll and transfer your Crisco pie dough will help you make amazing pies. Keep in mind, the more you practice, the better you’ll become. So, Keep trying different approaches until you find what suits you best.
Common Mistakes to Avoid When Making Pie Crust
Making the perfect pie crust is a delicate task. Even experienced bakers can make mistakes. To get a flaky, tender Crisco pie crust, avoid these three common errors.
Temperature Control Issues
Temperature is key for a successful pie crust. If the dough is too warm, the Crisco melts, making it soggy. If it’s too cold, rolling it out is hard and it shrinks when baked. Keeping the dough at the right temperature is crucial for a tough crust texture.
Overworking the Dough
It’s easy to want to knead the dough until it’s just right. However, overworking the dough can lead to a tough and chewy crust. Handle the dough gently, mixing ingredients lightly and avoiding too much handling.
Moisture Balance Problems
Getting the moisture just right is essential. Too little water makes the dough dry and crumbly. Too much water makes it soggy. Watch the recipe’s water amounts and adjust as needed for the perfect consistency.
Avoiding these mistakes will help you make a Crisco pie crust that’s flaky, tender, and full of flavor.
Tips for a Flaky and Tender Crust
To get a flaky and tender Crisco pie crust, pay close attention to detail. It’s key to use cold ingredients. This means keeping your flour, Crisco, and water cold. This keeps the fat solid, making the crust flaky when it bakes.
It’s also vital to handle the dough minimally. Excessive handling can result in a tough dough. Gently combine the ingredients. Don’t knead or overmix.
Lastly, let the dough rest for a while. Chill for 30-120 minutes. This lets the gluten relax, making the crust tender and easy to roll out.
- Use cold ingredients, including flour, Crisco, and water, to ensure the fat remains solid and creates a flakier texture.
- Handle the dough minimally to avoid overworking and developing tough gluten.
- Allow the dough to rest in the refrigerator for at least 30 minutes, up to 2 hours, to relax the gluten for a more tender crust.
“A perfect pie crust depends on attention to detail, from ingredient temperature to gentle handling.”
By using these tips and techniques, you can make a Crisco pie crust that’s flaky, tender, and perfect for your fillings.
Storing and Make-Ahead Instructions
Proper storage and preparation are key for your Crisco pie crust. Whether you bake it right away or make the dough ahead, knowing how to refrigerate, freeze, and thaw is crucial. This ensures your crust stays flaky and flavorful.
Refrigeration Guidelines
Keep your Crisco pie dough in the fridge for up to 3 days. Wrap tightly and store airtight. Let the dough sit out for half an hour before you roll it out.
Freezing Methods
- Freeze your dough for longer storage. Divide it into portions, wrap in plastic wrap, or use resealable bags. Freeze for up to 3 months.
- Refrigerate frozen dough overnight to thaw before baking.
Thawing Procedures
- Thaw frozen dough in the fridge, usually overnight.
- After thawing, roll out the dough for your pie.
- Thaw at room temperature for faster results. Watch it to avoid it getting too soft or sticky.
By using these storage and make-ahead tips, you can have your Crisco pie crust dough ready when you need it. This way, you don’t lose the quality and texture that makes it so tasty.
Troubleshooting Your Crisco Pie Crust
Making the perfect Crisco pie crust can be tricky. Don’t worry, a few simple tips can solve any issue. Whether it’s a crumbly dough, a tough crust, or uneven baking, these solutions will help you get it right every time.
Tackling Crumbly Dough
If your Crisco pie dough is too dry and crumbly, it might be because of the wrong ingredient mix. Try adding a tablespoon or two of cold water, one at a time. Gently knead the dough until it’s smooth. But, don’t overwork it, or it will become tough.
Preventing a Tough Crust
A tough, leathery crust often comes from overworking the dough or too much Crisco. To avoid this, be gentle when mixing the shortening. Stop mixing when the dough just comes together. Also, make sure your Crisco is at the right temperature. Too cold, and it won’t mix well. Too warm, and it makes the crust dense.
Ensuring Even Baking
Uneven baking can be a problem, where some parts are golden and others are pale. Make sure your oven is at the right temperature. Use a heavy-duty baking sheet or pie dish to spread the heat evenly. Rotating the pie halfway through baking can also help get a perfect crust.
By tackling these common issues and following best practices, you’ll make perfect Crisco pie crusts every time. With patience and attention to detail, you’ll impress your friends and family with beautifully baked pies.
Decorative Edge Techniques and Finishing Touches
Make your homemade pies stand out with various decorative edge techniques and finishing touches. From simple crimping to more complex designs, there’s a lot you can do to make your pie crust special.
Classic Crimping Methods
Classic crimping is a favorite for decorating pie crusts. It involves pinching and pressing the dough with your fingers. Here are some classic crimping methods to enhance your pie crust designs:
- Fluted Crimping: Pinch the dough between your thumb and index finger, creating a scalloped or fluted edge.
- Pinched Crimping: Use your thumb and index finger to pinch the dough at regular intervals, forming a series of small peaks.
- Forked Crimping: Gently press the tines of a fork against the dough’s edge to create a textured, wavy pattern.
Advanced Design Options
For a more advanced look, try these design options. They add elegance and interest to your lattice top or decorative edges:
- Braided Crust: Cut long dough strips and weave them around the pie’s edge for a braided look.
- Leaf Cutouts: Use a sharp knife or cookie cutter to cut out leaf shapes from the dough. Arrange them around the pie.
- Stamped Patterns: Use a decorative rolling pin or small cookie cutters to impress patterns into the dough.
Mastering these techniques will turn your homemade pies into stunning works of art. They’re sure to wow your family and friends.
Conclusion
Congratulations on mastering homemade pie crust! You now know how to make the perfect Crisco pie crust from scratch. You’ve learned about the right tools and ingredients, mixing techniques, and how to avoid mistakes.
With your new skills, you can bake delicious, flaky pies that will wow everyone. Use the right temperatures, handle the dough well, and add decorative edges. This will make your pies even better than store-bought ones.
Start experimenting with different fillings and designs to make your pies unique. As you keep practicing, making Crisco pie crust will become easy for you. Enjoy sharing your homemade pies and hearing the compliments from those who try them.
FAQ
What makes Crisco shortening a good choice for pie crusts?
Crisco shortening is great for pie crusts because it makes them flaky and tender. It’s better than butter or lard. This makes the crust superior.
What are the essential ingredients for a Crisco pie crust?
You need all-purpose flour, salt, chilled Crisco shortening, and ice-cold water for a Crisco pie crust. Use the right amounts and handle the ingredients carefully for the best crust.
How do I properly mix and knead the pie dough?
First, mix the Crisco with a pastry blender or forks until it’s like pea-sized crumbs. Then, add ice water slowly, mixing just until it forms a dough. Don’t overwork it to keep it flaky.
What techniques should I use when rolling out the pie dough?
Roll out the dough on a floured surface with a rolling pin. Make it even. Then, carefully put it in your pie plate without stretching or tearing it.
How can I prevent common issues like a tough or soggy crust?
Keep the dough at the right temperature and don’t overwork it. Also, make sure it has the right amount of moisture. Follow the steps carefully for a flaky and tender crust.
Can I make the Crisco pie dough ahead of time?
Yes, you can make the dough ahead of time. Refrigerate or freeze it, and thaw it when you’re ready. This saves time and keeps the dough ready for baking.
How can I add decorative touches to my Crisco pie crust?
Try classic crimping or more advanced designs to make your pie crusts look good. From simple edges to intricate lattice tops, there are many ways to make your pies look great.
Did You Try Our Recipe? Share Your Thoughts!
There are no reviews yet. Be the first one to write one.

