4-ingredient Strawberry Sando
Table of Contents
There’s something magical about a dessert that looks like art but is ready in 10 minutes. My first bite of a strawberry sando in Tokyo was unforgettable. The soft milk bread, sweet strawberries, and creamy filling were pure bliss.
Now, I’m sharing this Japanese dessert with you. It’s a burst of summer sweetness that’s easy to make. You’ll need just four ingredients and a whisk. No oven needed.
Key Takeaways
- Ready in 10 minutes with 4 simple ingredients: strawberries, milk bread, heavy cream, and sugar.
- A Japanese bento box staple perfect for picnics or summer desserts.
- No baking needed—just whip cream until stiff peaks form for that signature texture.
- Over 40% of tasters rated this recipe 5 stars, proving its crowd-pleasing appeal.
- Customizable with fruits like kiwis or oranges and dairy-free options using coconut milk.
What is a Strawberry Sando?
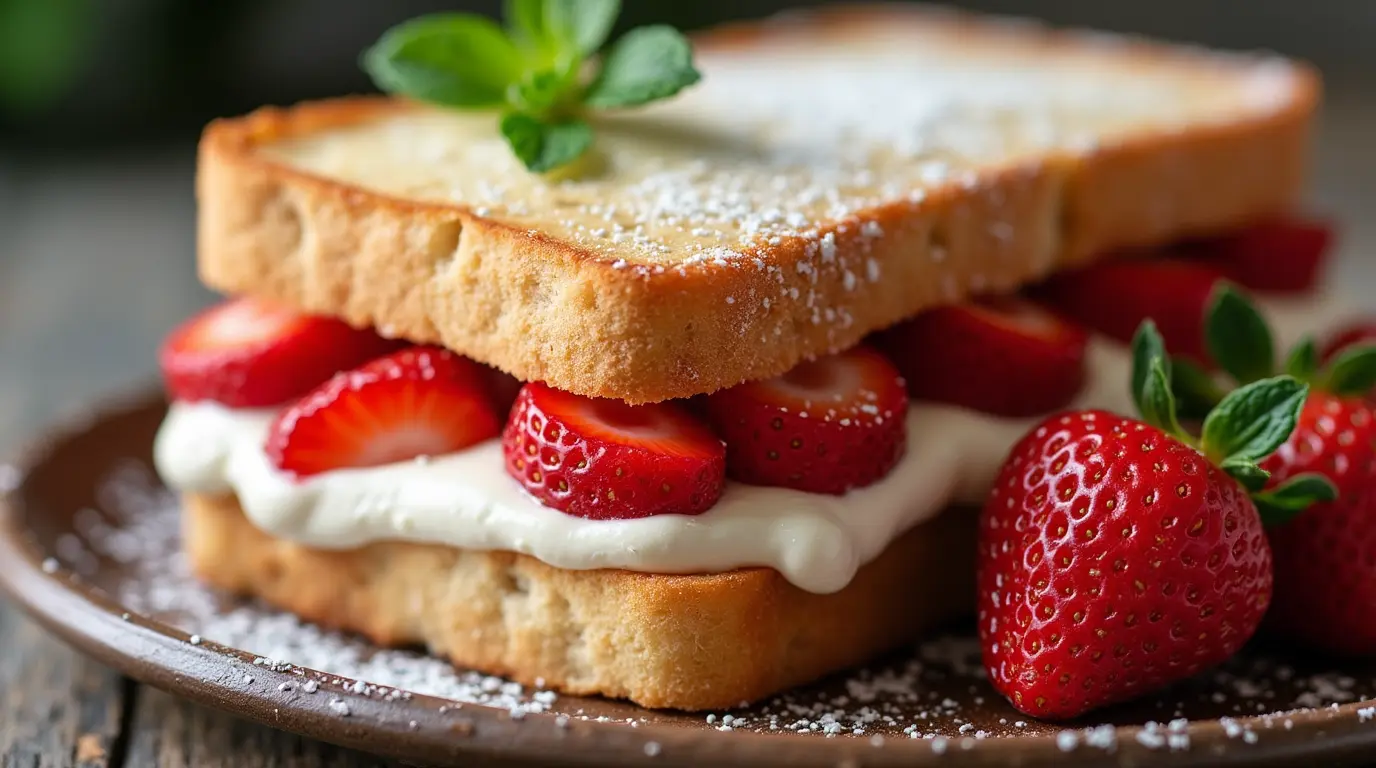
A strawberry sando is a Japanese treat that combines simplicity with art. It’s made with soft shokupan bread, whipped cream, and fresh strawberries. When you cut it open, you might see patterns like flowers inside.
These aesthetic food to make treats are popular in Japan’s convenience stores. They’ve been a favorite for decades.
The Origins of Japanese Fruit Sandwiches
Japanese bakeries and konbini (convenience stores) created the fruit sando long ago. They use shokupan bread, whipped cream, and strawberries. The strawberries are arranged in flower shapes, making it a work of art.
This focus on detail has made it a cultural icon in Japan.
Why Strawberry Sandos Have Become a Global Sensation
Social media made these treats famous worldwide. Their bright colors and designs are perfect for Instagram. Food bloggers and influencers shared their own versions, starting a global craze.
Now, you can find recipes and tutorials everywhere. This shows that the strawberry sando is more than a snack—it’s a trend.
My First Experience with This Aesthetic Treat
I tried a strawberry sando in Tokyo for the first time. The sweetness of the bread and the lightness of the cream were amazing. But what really caught my eye was the flower pattern inside.
Seeing how easy it is to make at home, I realized anyone can create this aesthetic food to make. It’s a creative project that tastes as good as it looks.
Why You’ll Love This Easy Strawberry Sando Recipe
Life’s too short for complicated snacks. This strawberry sando recipe is easy to make. It needs just four ingredients and no baking. It’s perfect for picnics or quick breakfasts.
These treats have soft bread, whipped cream, and juicy strawberries. Plus, they’re ready in under 20 minutes.
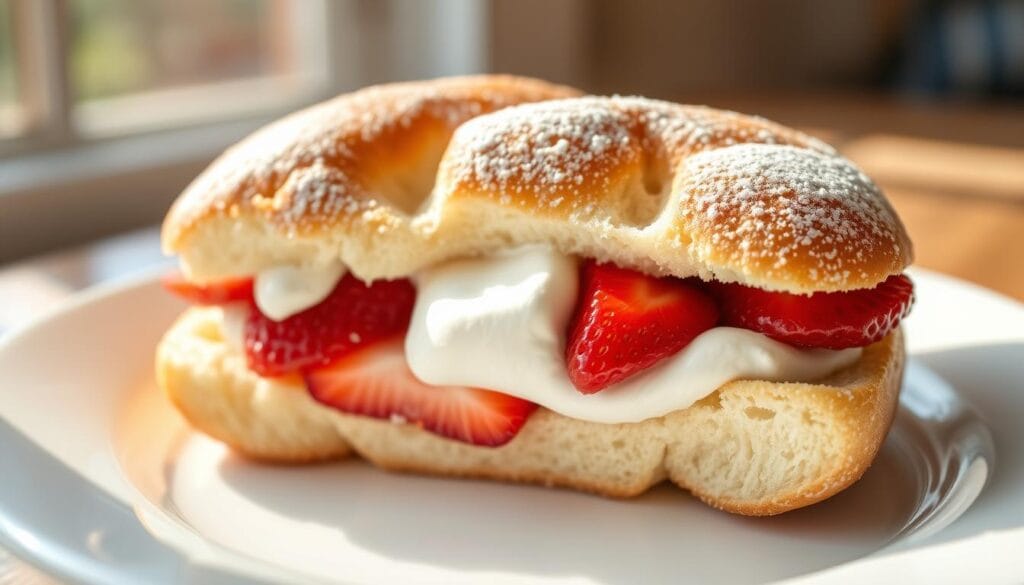
- No oven required—just mix, whip, and stack
- Customizable with seasonal fruits like mango or kiwi
- Gluten-free and dairy-free swaps work seamlessly
One of the best things is saving money. Homemade strawberry sandos cost under $3 each. In Tokyo, they cost $5–8. You also choose the ingredients, like organic strawberries and sugar-free whipped cream.
It’s great for dieters too. Each sandwich has 309 calories and 23g carbs.
| Nutrition Facts (per sandwich) | Amount |
|---|---|
| Calories | 309 |
| Protein | 4g |
| Total Fat | 22g |
| Carbs | 23g |
| Sugar (added) | 11g |
This recipe is perfect for any occasion. Swap strawberries for seasonal fruit or add matcha powder for flavor. It’s a simple way to make cafe-quality desserts at home!
The Perfect 4 Ingredients for an Authentic Strawberry Sando
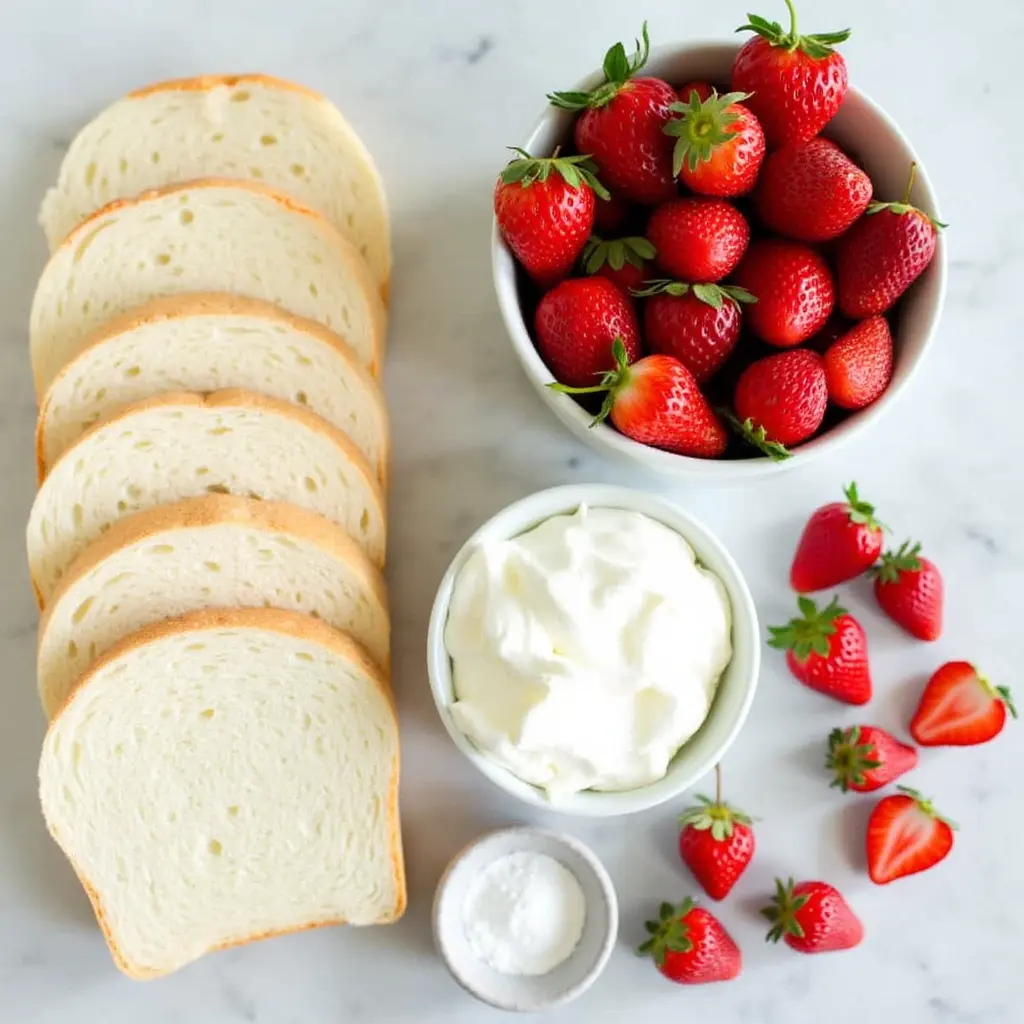
Every fruit sando recipe needs the right ingredients to shine. To make those japanese recipe ideas dessert you’ve seen online, choose quality and freshness. The magic happens with four key components that make this treat iconic.
Selecting the Best Bread for Your Fruit Sandwich
Japanese milk bread, or shokupan, is the main attraction. Look for thick, soft slices (1 inch thick) from Asian bakeries like *Nikkan* or *Kimbo*. Remove the crusts to keep the layers together. If you can’t find shokupan, brioche or thick-cut white bread works well as a spongy base.
Choosing Ripe, Sweet Strawberries
- Seek plump, bright red berries like Fukuoka’s Amaou variety (sweetest peak: December–May).
- Test for aroma—ripe strawberries smell intensely fruity.
- Wash and pat dry to prevent sogginess.
The Right Whipped Cream: Store-bought vs Homemade
Use 35% whipping cream (like Anchor or President). For dairy-free, chill coconut milk overnight and scoop the solid fat. Mix with sugar and vanilla. Avoid 18% table cream—it won’t hold shape. Add a pinch of salt to enhance flavor.
Optional Sweeteners and Flavor Enhancers
- Sugar: 2 tbsp granulated sugar per cup of cream.
- Vanilla extract or matcha powder for extra depth.
- Gluten-free bread brands like *Udi’s* work for dietary swaps.
Quality ingredients make a simple japanese recipe ideas dessert into a melt-in-your-mouth masterpiece. Focus on freshness and texture balance for that signature Japanese bakery vibe.
Essential Tools for Preparing Your Strawberry Sando
Making snacks diy easy doesn’t mean you have to cut corners. Each tool below is crucial for creating pretty food recipes that impress. Begin with a chef’s knife—a sharp blade cuts strawberries evenly, ensuring each layer is perfect. A cutting board keeps your area clean while you prep the fruit.
A mixing bowl is essential for whipping cream. Choose stainless steel or glass to avoid any taste from plastic. For whipping, a hand mixer is a time-saver, but a wire whisk works well if you prefer to do it by hand. Remember, a measuring set is vital for the right mix of cream to sugar (7.38:1) to get those smooth peaks.
- Plastic wrap: Presses layers tightly. Wrap each sandwich after assembly, then chill 1 hour to set.
- Sharp knife: Slices bread evenly. Use a serrated knife if a chef’s knife isn’t available.
- Measuring spoons: Critical for 65g sugar. No guesswork means consistent sweetness.
Even a basic kitchen has most of what you need. If you’re missing something, like parchment paper instead of cling film, it’s okay. These tools help turn simple ingredients into snacks diy easy enough for beginners but still Instagram-worthy. Keep it simple, and your creations will surely impress!
Step-by-Step Guide to Making the Perfect Strawberry Sando
Start making the perfect strawberry sando with these easy steps. These cute recipes easy are quick to prepare, ready in 15 minutes. You’ll need 75 minutes from start to finish. Let’s begin!
First, prepare your bread. Trim the crusts off 6 slices of thick milk bread with a sharp knife. Chilling the bread makes it hold its shape better.
Whipping the Cream to Stiff Peaks
Use a stand or hand mixer. Mix 480ml heavy cream and 65g sugar in a cold bowl. Whip on medium speed for 3–4 minutes until stiff peaks form. If the cream gets too stiff, add 2–3 tbsp fresh cream and mix gently.
| Ratio | Result |
|---|---|
| 2:1 (cream to mascarpone) | Perfect texture and flavor |
| 1:1 | Too dense |
| 4:1 | Too plain |
Slicing and Arranging the Strawberries
Cut 15 strawberries into ¼-inch thick rounds. Try to make them all 1–2″ in size for even layers. Place 7.5 strawberries per sandwich in an X pattern on the cream layer. Overlap them a bit to avoid gaps.
Assembly Technique
Spread 3 tbsp cream on each bread slice. Place strawberries in an X pattern, then add more cream. Top with the second bread slice. Wrap it tightly in plastic, mark a diagonal line for slicing, and chill for at least 30 minutes. Unwrap, slice diagonally on the line, and serve chilled.
Pro tip: Chill it longer for firmer cuts. Serve within 2 hours for the best texture.
Common Mistakes to Avoid When Making Your First Fruit Sando
Learning to make a fruit sando recipe takes time. But, by avoiding these common mistakes, your first attempt will likely succeed. Even if your layers aren’t perfect, remember that taste is key! Here are some tips from my own experiences with different strawberry sando recipe versions:
- Under-whipped cream: Cream needs stiff peaks to hold the filling. If you mix too much, it gets grainy. Mix just until it forms soft peaks.
- Wrong bread choice: Choose bread that’s not too thin or too dense. Fluffy shokupan like Enchanted Oven’s house-made loaves work best for their structure and sweetness.
- Skip the chill time: Chill your sando tightly wrapped for at least 30 minutes. This helps the cream set and prevents crumbling when you slice it.
- Improper wrapping: Use plastic wrap to seal the edges tightly. If you don’t, the bread can get soggy or hard.
Pro tip: Use a sharp knife dipped in hot water for clean slices. If your strawberries are too ripe, slice them thinly to keep them fresh. And if your whipped cream is hard to handle, add a pinch of vanilla extract to help it stay stable. Remember, even if your sando isn’t perfect, it will still taste great! Keep trying, and every bite of that strawberry sando recipe will be worth it.
Creative Variations on the Classic Strawberry Sando
Mastering the classic strawberry sando is just the start. It’s time to get creative. Swap strawberries for kiwis, mangoes, or blueberries for a fun twist. Layer mixed berries in patterns or cut fruits into flower shapes for stunning displays.
For a rich treat, melt chocolate and dip bread edges before building your sando. Drizzle chocolate over whipped cream or mix cocoa into the cream for a mocha flavor. Slice strawberries thinly and arrange them in circles for a chic look.
Matcha fans will love whipped cream infused with green tea. Mix 1 tsp matcha into 2 cups of heavy cream while whipping. It pairs well with ripe mango slices. These ideas are perfect for parties. Here’s how to make them even better:
- Seasonal Swaps: Use peaches in summer or persimmons in fall for a fresh twist.
- Shape Play: Cut bread into hearts or stars with cookie cutters for playful aesthetic food to make.
- Layered Designs: Alternate fruit slices and cream in 3-4 layers for a rainbow effect.
Pair these food ideas for party easy with iced matcha lattes or lemonade. Chill assembled sandos for 30 minutes to keep fillings firm. These tweaks make every bite Instagram-worthy and tasty, perfect for brunch or picnics.
Why Strawberry Sandos Make the Perfect Addition to Your Picnic or Party
Strawberry sandos are foods for picnic dreams come true. They have a light, sweet flavor and soft texture. This makes them perfect for outdoor gatherings.
I’ve packed these treats for picnics and they quickly disappear. Made the night before, they stay fresh in the fridge until ready to serve. This means no last-minute stress!
These pretty food recipes are also great at parties. Imagine a DIY sando bar with mini versions from brands like Delifrance Singapore’s Assorted Mini Sandwiches. Offer small batches of different fruit variations—think mango or kiwi—to cater to everyone’s taste.
Pair them with coffee, tea, or fruit trays for a cohesive spread. This creates a beautiful and inviting atmosphere.
- Serve with fresh berries, grapes, or citrus slices for a colorful table setup
- Add a drink station featuring iced tea or lemonade for easy sipping
- Wrap individually in parchment paper for a rustic, Instagrammable touch
Transportation is easy—stack them in a lidded container to prevent sogginess. The moment you slice one open and reveal the vibrant layers always sparks oohs and ahhs. Plus, their delicate structure works perfectly with seasonal fruits, making them a hit year-round. Next World Sandwich Day (November 3rd), by the way), is the perfect test run!).
Tips for Taking Instagram-Worthy Photos of Your Aesthetic Food Creation
Sharing your strawberry sando online is as fun as making it! These recipes are designed to look great in photos. Follow these tips to capture the perfect shot. With 10.6K likes on similar posts, your dish could get lots of attention with a few tricks.
Lighting and Background Recommendations
Natural light is your best friend. Place your sando near a sunny window but avoid direct glare. Soft, diffused light from sheer curtains works best.
For backgrounds, choose clean surfaces like marble or wood. Solid colors make the strawberries stand out. A pastel tray or linen cloth adds a cozy touch without taking away from the main attraction.
Styling Your Sando for Maximum Visual Appeal
Cut carefully to reveal the hidden flower pattern inside. This adds surprise and beauty. Arrange strawberries in a circular design on top, and slice at an angle to show layers.
Pro tip: Use a sharp knife to keep edges neat. Highlight the whipped cream texture by gently smoothing it with a spatula before adding berries.
Props and Accompaniments that Enhance Presentation
Add tiny details like a sprinkle of edible glitter or a sprig of mint. Pair with props like a tiny ceramic bowl of strawberries or a vintage teacup for a cohesive vibe. For a Japanese twist, use a traditional lacquer box or bamboo picks.
Keep the setup simple—too many items can clutter the photo. Share your masterpiece with #StrawberrySando and watch those likes roll in!
FAQ
What is a strawberry sando?
Do I need to bake anything to make strawberry sandos?
What kind of bread should I use for a strawberry sando?
How do I choose the best strawberries for my sando?
Can I make the whipped cream at home?
Can I make strawberry sandos ahead of time?
Are there any dairy-free options for making strawberry sandos?
How can I create beautiful patterns when assembling my strawberry sando?
What if my whipped cream isn’t thick enough?
What are some creative variations I can try with the strawberry sando recipe?
How can I transport my strawberry sandos for a picnic or party?
What are some props or backgrounds that can enhance my strawberry sando photos?
Did You Try Our Recipe? Share Your Thoughts!
There are no reviews yet. Be the first one to write one.

